How to insert a table in your resume
A small table is useful for things that line up in columns. A list of tools with your level in each, or clients beside the result you delivered. You can put one in any Details field.
-
Click into the Details field where you want the table. The formatting bar appears above it.
-
Click the table button in the bar, near the right end. A grid opens.
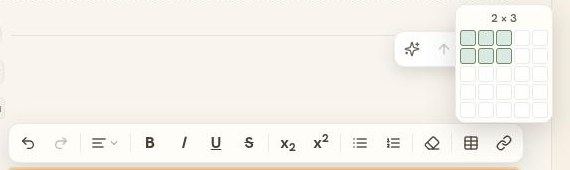
Move across the grid to size the table. The label above it counts the rows and columns. -
Move across the grid until it shows the size you want, then click. The table drops into the field with its columns evenly spaced.
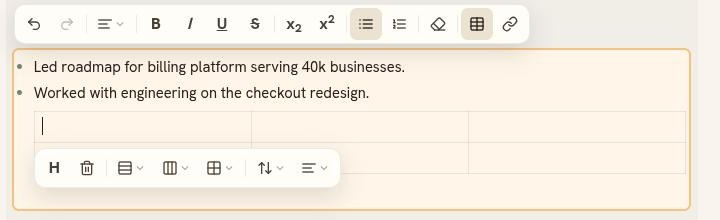
A second toolbar follows your cursor around the table. It adds and removes rows and columns. -
Type in a cell, and press Tab to move to the next one. Once you have typed in the last cell, Tab there adds a new row.
Changing a table you have made
Click any cell and use the toolbar that appears under it. It turns the first row into a header, adds and removes rows and columns, aligns the text inside a cell, and deletes the table. You can also drag a column edge to make it wider or narrower.
Ctrl+Z undoes a table change exactly like it undoes typing, so nothing you try is permanent.
Good to know
- Tables print in your PDF and show on your public resume page.
- Keep tables small. Two or three columns read well on paper; a wide table crushes the text.
- Running "Improve with AI" over a field that holds a table rewrites the words around it, and can rewrite the text inside its cells. The rows, the columns, and the layout are never changed. Use "See what changed" to read every cell it touched.